
Meine Nähpläne 2024/25:

Griselka Design bei
Redbubble

Spoonflower

Griselka auf
Bloggerparties:


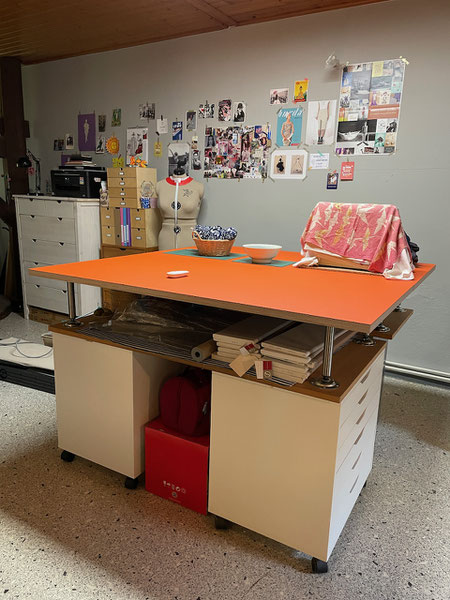
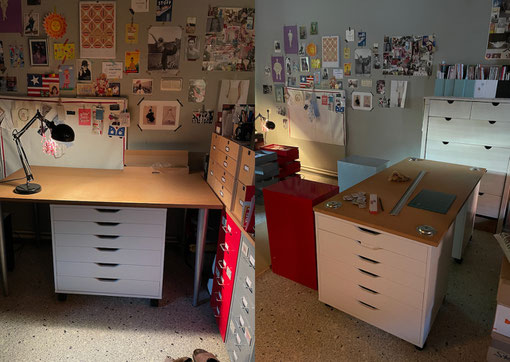
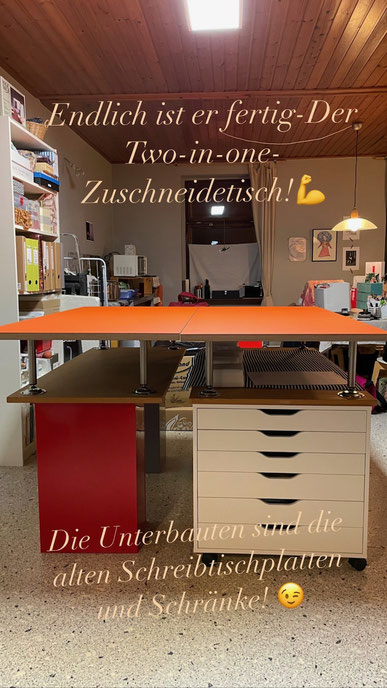
My sewing studio project for the year is finally complete. I am so happy that it turned out so beautifully.
I finally have a cutting table at a back-friendly height. That is especially important at my age. If I had known how much fun it would be to work on, I would have purchased one long ago.
But back-friendliness wasn't the only reason. I wanted more storage space for all my sewing supplies. Actually, mostly for all my sewing journals. But now I put them in my closet, which used to be my parents' living room closet. There I could create good space for it.
And I wanted to finally clean up the junk corner. It had been a thorn in my side or a needle in my finger for some time. Yes! This one!!
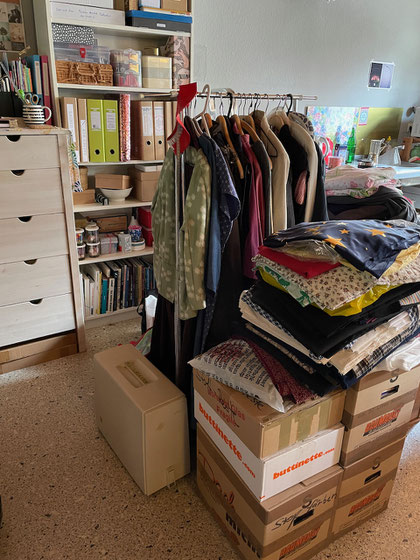
This clutter island was always in my way. But I didn't know where to put all the stuff. I wanted to use the space more sensibly and more beautifully.
Plus, this part of the room was always way too dark for me. So I wanted a nice bright work light above the cutting table. My sewing studio is on the ground floor. It's rather dark there, even in the summer.
Sometimes it takes a while to come up with the good solutions. For me, that's often the case. But once I have decided, there is no stopping me.
By the way, I have rented this sewing studio for almost 10 years. I've accumulated a lot of stuff. The fabrics and sewing supplies multiply strangely enough by themselves! You know it, right?
Next year, on the occasion of the 10th anniversary, I would like to take you on a video tour of my sewing studio. I hope I can pull that off. I've never done it before. But practice makes perfect. Not only in sewing!
Since I want to tell then on Insta and FB also the special story about it. You may be curious!
But now back to my cutting table!
I have of course thought about how it should look. There are countless examples on Pinterest or Insta. Only they all looked kind of the same. In January, I then began to draw a bit and plan.
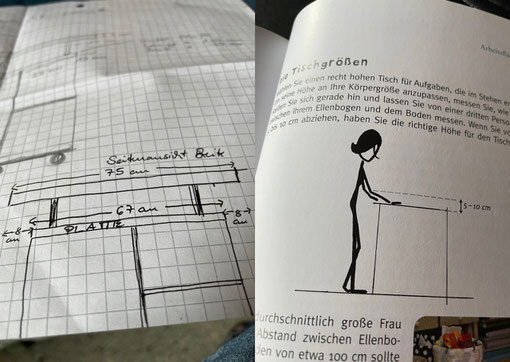
I wanted a large work surface so that I could cut the fabrics in a single layer without having to lay them on the floor. It is neither back nor knee friendly.
So I thought of a square work surface with 150 x 150 cm. Most fabrics are 140 cm wide. Then I still have some table at the end of the fabric.
In January I had already planned everything and then let it rest a bit, in case I should still think of changes. In March I had to hit then, because there was a 20% Corona discount on all furniture. This motivated me again to start the project cutting table.
But because the boards had to be made first, I had to be patient until July. It was a tough time, but full of anticipation.
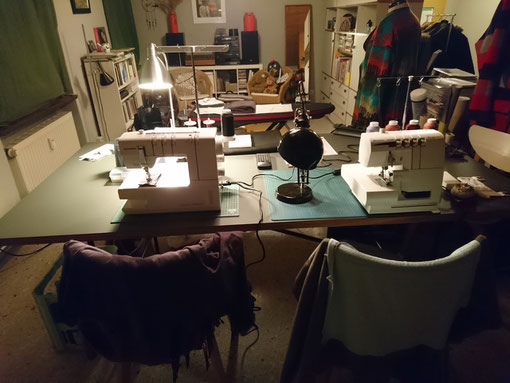
Until now, I had cut everything on my all-around table and then sewed on it as well. Of course, that meant I always had to put everything away first when I sewed or cut.
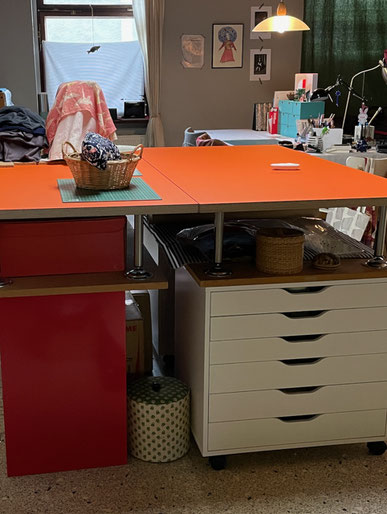
The table measures 1 x 2 m. Also a very comfortable individual size, but unfortunately not so back friendly in height. I now only use it for sewing and as a desk. It is from the same company as the orange table tops of the cutting table, also with linoleum surface only in anthracite.
This is also a favorite color of mine. Actually, I like almost all colors. By the way, the walls in the studio are also gray! :-)
For reasons of cost and sustainability, I wanted to use the desk elements from my first writing and sewing table as the bases of the new cutting table. From old make new, so to speak. Another benefit of this is that I don't have to completely get used to rearranging the drawers because I left the sewing supplies in as before.
Yes, I know I'm confusing you with all the tables. But it's simple. The two old desks become the big cutting table and the gray one is now the writing and sewing table. I hope this has clarified things for you. Here are a few more photos for clarification.
The desk tops are from the hardware store and also have individual dimensions. We have also moved them several times.
One of the two I had to cut shorter so that it fits well under the new table tops. Luckily, my helpful, handy neighbor was able to help me with that in his workshop. But as it happens, he is short on time and I had to be patient until I could get on with the assembly.
The drawer cabinets will look familiar to most of you. Real classics from the furniture Sweden.
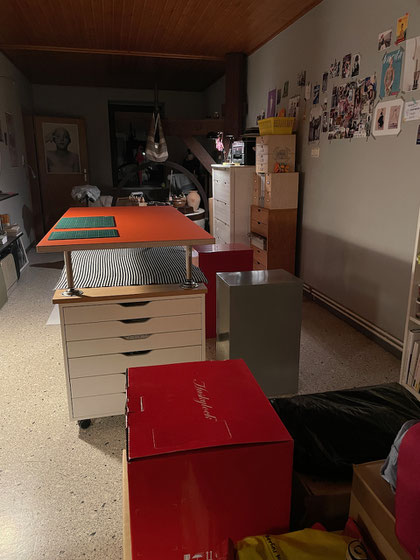
Here you can see perhaps also quite well, why I have actually built a two-part cutting table. I was inspired by the different drawer cabinets and old desk tops that I wanted to reuse.
I thought to myself that this is not so wrong to be able to make two out of one table sometimes, which can be placed around corners or next to each other. Space would definitely be available in my sewing studio. And in case of an eventual move (to an even bigger sewing studio - little joke! - the individual pieces would be easier to transport. I love flexible furniture! As a frequently moved ex-Berlinerin I have gained a lot of experience there...and my poor friends too.
That's why I didn't screw all the elements together. You can simply take everything apart and move it around.
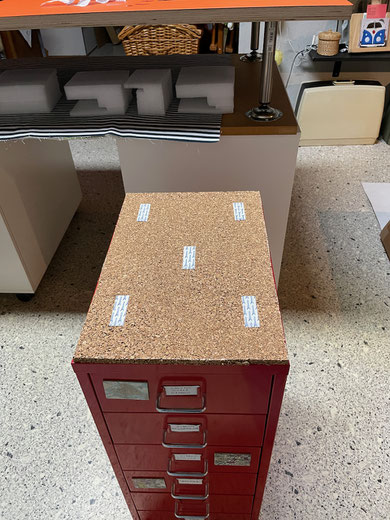
The "Alexes" have rollers. There I had to screw a little guidance under the plate, so that when moving everything does not totally slip.
For the metal cabinets, I only glued on the cork plates as height compensation.
Now for the trickiest part of the undertaking:
I liked to have the table surface overhang a bit so I wouldn't always bump into the cabinets with my big feet and knees. If you bruise quickly like I do, that's better!
That's when it was important to center the old desk tops on the new ones.
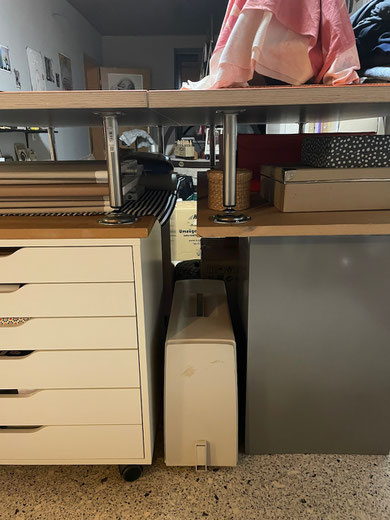
It was practical that I could use the old desk tops in reverse, so I could leave the old sockets of the desk legs. I needed them to hold the new table tops in place so they wouldn't slip. First I had to think about how to fix the supports without having to screw them down. I had already collected crown corks in orange. Now I don't need them anymore. I am now happy about this more elegant solution.
Ah yes, I forgot to tell you. Of course, I wanted to create extra storage space with the double layer of panels. Not only because of the more comfortable working height! There you can still accommodate a lot of things.
Here you can see the marks for the supports and how I screw them to the new panels. I love our cordless drill!
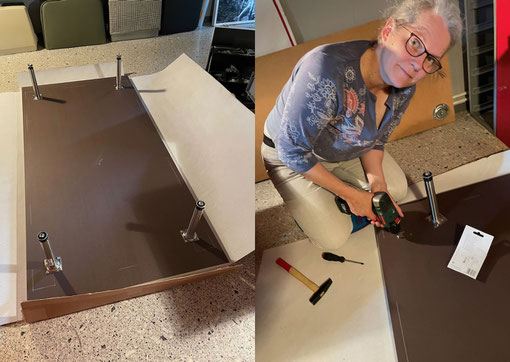
Since the second old table top was shortened, I naturally had to move the table leg sockets. That worked out quite well. But I had to do it again, because I had screwed the supports wrong by half a centimeter. That was easier to do than to screw the supports over again. I don't know anymore...I must have had a kink in the pupil.
You can still see the misalignment here on the picture. I must have chosen the wrong marking. ;-)
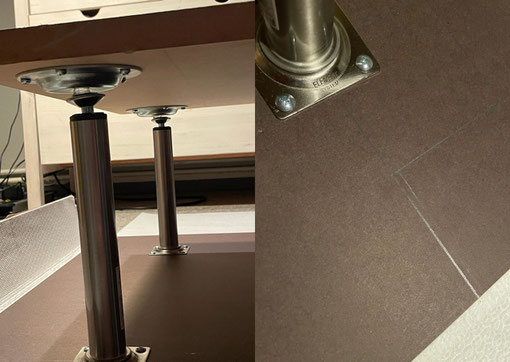
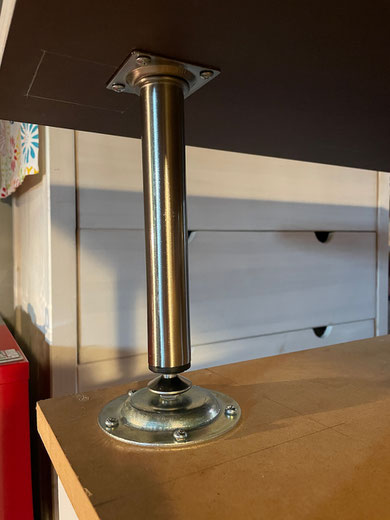
By the way, these plastic bumps are great for holding the supports in the sockets. And the supports or feet, as you want, I can change the height.
This is what it looks like in the end!
Between the construction of the first half of the table and the second, I was still waiting for the large LED light. Because that should also be attached before I completely set up the cutting table. My husband was a great help with this.
The installation of the lamp was not complicated, but you needed four hands! It all worked out great thanks to our diy construction (see photo), but when I had to stand on the table to stop, the plastic bumps under the supports unfortunately didn't hold up to my "fly weight". I do not understand at all ...!
Somehow this was no problem at all. I was able to adjust the support height and thus create compensation. Now everything is at the same height and in the right place! I am very pleased with my work!

The LED lamp has 12 levels and I can adjust it with the remote control. This is really fun and finally I have proper working light! There is also the option to choose between cold and warm light temperature. In case it gets too OP for me.
I'm really happy with this combo now! Bright light and a back-friendly working height makes cutting much easier. But I am thinking about using the sewing machines at this table. At least the overlock machine. Well, I can try it all out and report back to you. For now, I'm happy about the fresh new splash of color in my sewing studio. It's going to be a whole different way of working!
I came up with the color orange for the surfaces of the table tops when I wanted to plan them with the online configurator from modulor. This is a great artist and designer supply store in Berlin-Kreuzberg on Moritzplatz. When I still lived in Berlin and worked nearby, I loved spending my lunch breaks there. So on their website you can customize your work desks in size and design. There is a particularly large selection of colors for linoleum surfaces. But the orange color caught my eye right away and didn't let me go. It was love at first sight!
By the way, the color orange stands among other things for joie de vivre, exuberance, optimism, self-confidence and creativity and strengthens the nervous system.
That can be used very well in this day and age. Orange is also supposed to stimulate the appetite. I'll have to strictly ration the munchies in the sewing studio.
I'm not sure yet if it's all true, but maybe if I sew very hard...I'll report if it works.
Now you probably still want to know how it behaves with the newly gained storage options.
I haven't put away the pattern magazines, but in the second Alex, which I also bought, I now have all my cutting rulers and pattern tracing papers as well as some sewing accessories. Now everything is more clearly arranged.
And I still have storage space under the tables between the drawer elements for my over and coverlock and the old Singer sewing machine plus accessories.
In the space between the top and bottom table tops, I have stuff right now that's just supposed to stay there temporarily. Let's see how long that "temporary" will be. :-) Maybe I can park cut stuff there waiting to be processed. I think I would like that quite a bit. I'm sure that will come up over the course of using it.
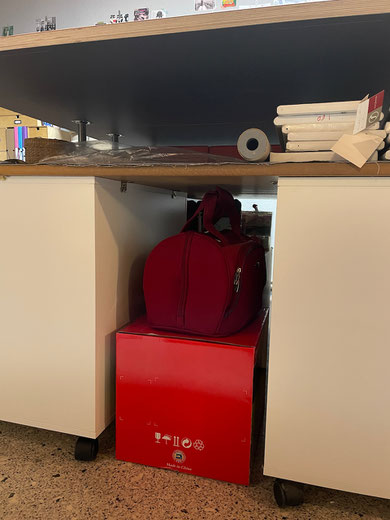
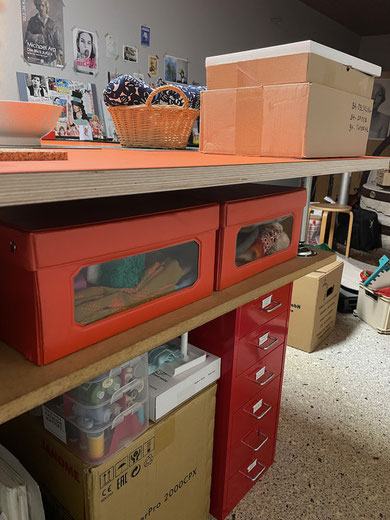
The orange storage boxes, which by the way are from the seventies, still contain scarves and hats at the moment, but because they fit so well with my sewing table, I'll probably put something like interfacing or fabric scraps in there. In the red container I have ribbons and trims and needles and more yarns and test pieces from the sewing projects. I always keep those because I like to keep using them as test pieces. They also remind me of all my sewing projects.
I hope you enjoyed my report on my new cutting table. I am very happy that I could integrate the old desks. So it also became a small sustainable project. It consists half of old and half of new elements.
Now I can finally get back into full swing with the new sewing projects.
In February there will be another sustainability review from me on my blog for 2021.
I wish you a wonderful holiday season and a happy new year, by hopefully soon we can be together again more freely. I have already booked a sewing camp for the spring together with a friend. I am really looking forward to it!
Best regards,
Griselda
+++sayNOtofastfashion+++
Data for my cutting table:
Size: 2 table tops made to measure à 75 x 150 cm.
Material: linoleum table top, curcuma color, edge banding 30 mm multiplex, 1 Alex drawer element
Accessories: eight short legs, height-adjustable, plastic bumps, screws, table leg edgings, cork boards
source: Modulor, Bauhaus, DIY store, Ikea
existing elements: 1 Alex drawer unit, 2 Helmer containers, 2 old MDF table tops with the sockets of the former table legs
Kommentar schreiben